nemvágoom 2008. 06. 24. 13:47 | #26
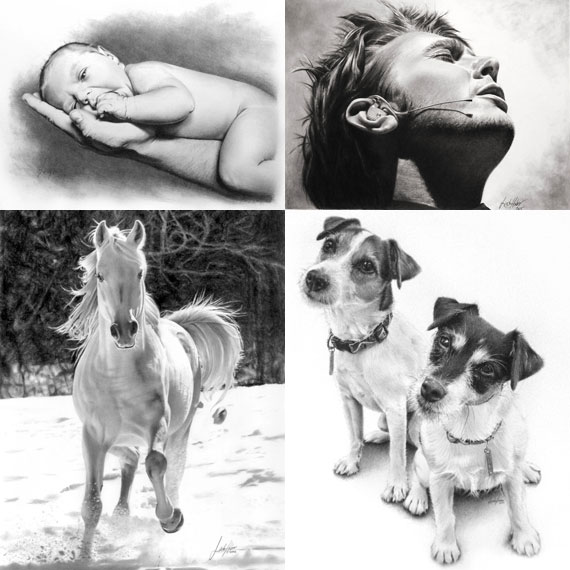
Nagyon szép rajzok.De ilyen tehetséget miért ilyen képekre pazarol???
0
VÁLASZ
Máln@ 2008. 06. 07. 08:34 | #23
Jah,amúgy meg sztem meseszép képek/munkák/rajzok ....vagy mik:/ :)
És nem hiszem,hogy nektek(akik mondják hogy nem rajzolva van...meg másol...meg stb),azoknak elsőre,amikor a képeire néztetek nem azon akadt meg a szemetek,hogy milyen szépek ezek,hanem az,hogy ááh...biztos fotósopp...vagy sablonnal csinálta!!Vannak olyan emberek szerintem igenis,akik nagyon tehetségesek rajzban,és tök mindegyszámora,hogy mivel csinálta,a végeredmény a fontos.
Ezzel nem azt akarom mondani,hogy tuti kézzel készített rajzok...felőlem lehet fotósopp is...meg másolás is...nekem 8....de jó háttérképnek néhány akkor is!!!!!!!!!;)
0
VÁLASZ
Dralisz 2008. 06. 07. 06:45 | #19
én is szoktam rajzolni és elmondom sima ceruzával meg radírral esélyetek sincs. :D
egyébként ha tudtok angolul az oldalán leírja hogyan csinálja:
1. Use only clear large reference photos to work from
2. Use good contrast photos (lots of darks and light tones) a good balance makes for a great drawing
3. Print out the reference in grayscale, lighten the photo to better see shadowed areas (print different samples)
4. Do not draw from full frontal flash photos, they will look flat
5. Begin with a light outline (draw a one inch grid with the H)
6. Use a clean piece of plain paper under your drawing hand to prevent any smudges
7. Keep works in progress (wips) covered when your not working on them
8. Work on a small, 1-2 inch area at a time, finish it to near perfection before moving on
9. Use a mechanical pencil to draw in details, the point is always sharp
10. Leave highlights untouched and draw around them, use the kneaded eraser to lift out highlights when needed
11. Color in tones with light-med pressure making sure to keep you pencil strokes close together
12. When coloring in an area use circular stokes making sure to overlap all
13. Wrap a piece of clean plain tissue around one finger and blend your mid tones
14. Blend medium tones and then recolor in the area, build your tones until they are realistic
15. Blend all hard lines, unless they are also seen in the reference or in real life
16. Use a mirror when drawing a portrait, besides the photo reference you are your best reference
17. Use a 3b pencil to build up the darkest tones, layer them and do not blend for near black tones
18. Go darker to give the drawing more depth
19. Turn the drawing and reference upside down to better see and render shapes
20. Draw ever tiny detail you see, it’s the details that give the drawing realism
21. Use light layers of a workable fixative on the finished drawing to help reduce graphite shine and smudges
22. Keep in mind that an artist never stops growing, like everything in life you learn as you go along, time truly is your friend
23. Oh and if you rush a drawing it will show so sloooooow way down and enjoy your artistic journey.
igen... az eleje photoshop! :P
Nem rosszak a képek, de fénykép nélkül nem megy sokra :) Másolni meg nem olyan nehéz csak gyakorlás kérdése, nem a tehetségé.
0
VÁLASZ
Erunder 2008. 06. 06. 18:40 | #10
Tudtommal van egy olyan technika amikor a fkete fehér fotót grafit cerucával tónusozzák. Abból lehet ilyenek kihozni. Legalábbis láttam egy kiállítást amin az összes kép azzal a technikával készült és így néztek ki a képek, newm azt mondom h ő is így csinálhatta de lehet és az is h szabad kézzel rajzolta meg tónusozta. Mindenesetre mindkét verzióban nagyot alkotott mert ha még fotó is akkot is profi, szép és igényes munka. (Nem mellesleg rendkívül kreatív)
0
VÁLASZ
Szmiri 2008. 06. 06. 16:02 | #7
nana, sosem lehet tudni, persze nem akarom kétségbe vonni a nő szavahihetőségét de photoshopban simán lehet ilyeneket csinálni fotó alapján:) hogy most ezek között van-e photoshopos munka vagy nincs az már az ő lelkén száradjon :P ha nincs akkor tényleg le a kalappal.
0
VÁLASZ
